Prepare the Birria:
- Start by rehydrating the dried chiles. Remove the stems and seeds, and soak them in hot water for about 20-30 minutes, until they’re soft.
- In a blender, combine the softened chiles, onion, garlic, cumin, cinnamon, cloves, oregano, and some of the soaking water. Blend until smooth.
- Season the beef chunks with salt and pepper. In a large pot, sear the beef in batches over high heat until browned on all sides. Remove the beef and set aside.
- In the same pot, add the chile sauce and cook for a few minutes, stirring frequently. Return the beef to the pot, add bay leaves, beef broth, and apple cider vinegar. Bring to a simmer, cover, and cook on low for about 3 hours, until the meat is tender and pulls apart easily.
- Once the meat is done, remove it from the broth, shred it with two forks, and set aside. Strain the broth and keep it on hand for dipping the tacos.
Assemble and Cook the Tacos:
- Heat a large skillet or griddle over medium heat.
- Dip a corn tortilla in the birria broth to lightly coat it, then place it on the skillet.
- Sprinkle cheese generously on the tortilla, then add some of the shredded birria meat on one half of the tortilla.
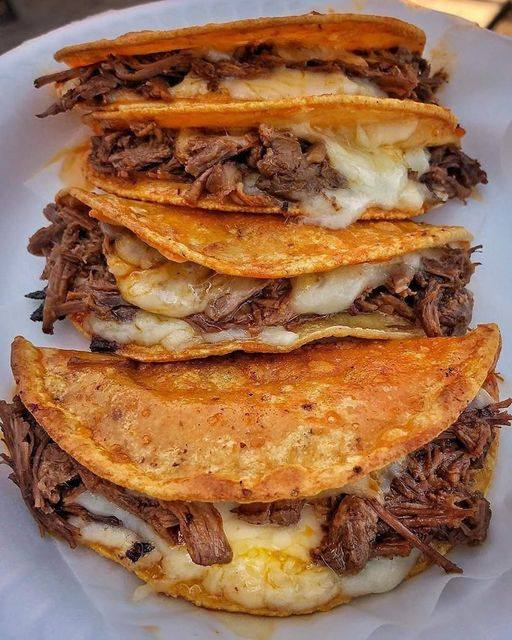
- Fold the tortilla over to form a taco. Cook until the tortilla is crispy and golden-brown, and the cheese has melted, about 2-3 minutes per side.
- Repeat with the remaining tortillas, cheese, and meat.
- Serve the quesabirria tacos hot, garnished with chopped onion and cilantro. Offer lime wedges and a small bowl of the warm birria broth for dipping.
Quesabirria tacos are a celebration of flavors and textures, combining the rich and complex taste of birria with the comforting goodness of melted cheese, all encased in a crispy tortilla. This dish is not only incredibly satisfying but also perfect for sharing, making it a great addition to any gathering. Enjoy your homemade quesabirria tacos with friends and family, and don’t forget to dip each bite into the savory broth for the full experience!
