1. Prepare the Dough
- Mix Dry Ingredients: In a large mixing bowl, combine the flour, sugar, instant yeast, and salt. Mix well to distribute the yeast and salt evenly throughout the flour.
- Add Wet Ingredients: Make a well in the center of the dry ingredients. Pour in the warm milk and the beaten egg. Mix until a rough dough forms.
- Knead the Dough: Transfer the dough to a floured surface and knead for about 10 minutes, until the dough is smooth and elastic. Incorporate the softened butter a little at a time while kneading until it’s fully absorbed into the dough.
- First Rise: Place the dough in a greased bowl, cover it with a damp cloth or plastic wrap, and let it rise in a warm, draft-free place for 1 to 1.5 hours, or until it has doubled in size.
2. Shape the Buns
- Punch Down: Once the dough has doubled, punch it down gently to release the air.
- Divide: Turn the dough out onto a lightly floured surface. Divide it into equal portions, depending on the size of buns you want (usually 10-12).
- Shape: Take each piece of dough and shape it into a smooth ball. To do this, pull the sides to the center and pinch to seal, then roll the ball against the surface to smooth it out.
- Second Rise: Place the shaped buns on a baking sheet lined with parchment paper, leaving enough space between each bun for expansion. Cover them with a damp cloth and let them rise again for about 30 minutes to an hour, until puffy and nearly doubled in size.
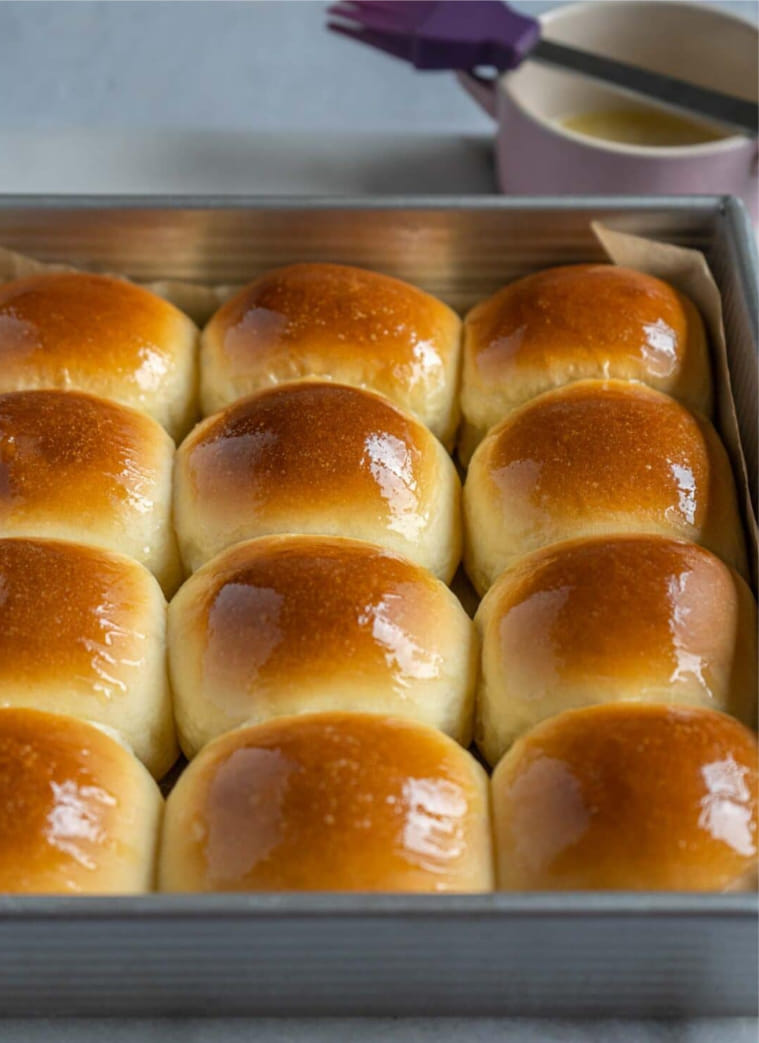
3. Bake the Buns
- Preheat Oven: Preheat your oven to 375°F (190°C).
- Egg Wash (Optional): For a shiny, golden finish, lightly beat an egg and brush it over the tops of the buns. Sprinkle with sesame seeds or pearl sugar if desired.
- Bake: Bake the buns in the preheated oven for 15-20 minutes, or until they’re golden brown and sound hollow when tapped on the bottom.
- Cool: Transfer the buns to a wire rack to cool completely before serving.
Tips for Success
- Milk Temperature: Ensure your milk is warm but not too hot to activate the yeast without killing it.
- Kneading: Kneading the dough until smooth and elastic is key to developing gluten, which gives the buns their soft texture.
- Proofing: Ensure the dough is allowed to proof in a warm, draft-free environment to help it rise properly.
These easy-to-make milk buns are not only delicious but also incredibly versatile. Serve them warm with butter, use them for your favorite sandwiches, or simply enjoy the comfort of freshly baked bread. Happy baking!
